VM Images and Templates in OLVM
Peter Goldthorp, Dito. February 2022
Instructions and notes for VM template and image management in OLVM
ISO image upload
- Download an iso image to your laptop
-
Navigate to the Storage - Disks and select
Startfrom the upload drop down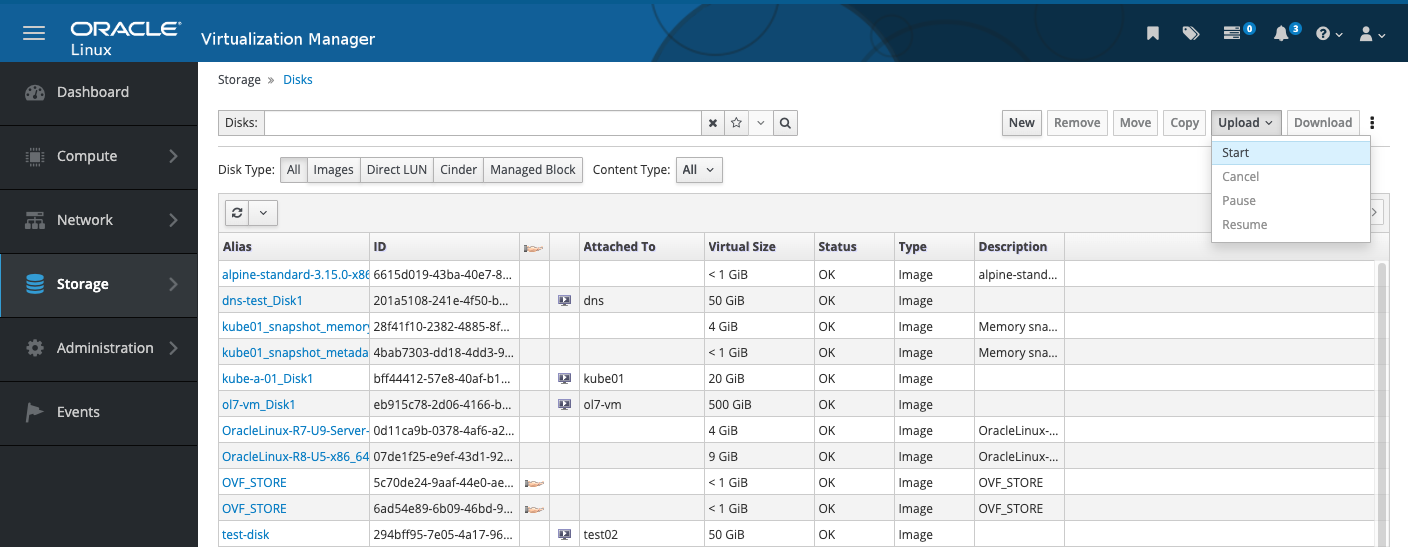
-
Select the image you want to upload and hit the
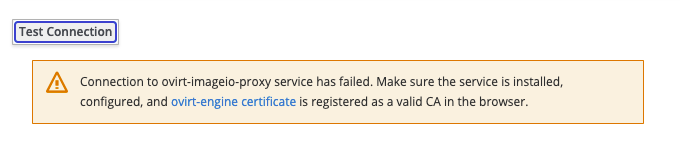
Test Connectionbutton
- Hit OK to upload the image if the connection shows a green connection successful message
-
Install TLS Cert if the connection fails
- Google Chrome:
- Open Settings > Advanced >Manage certificates
- This will open a Certificates pop-up window
- Navigate to the “Trusted Root Certification Authorities” and import the downloaded certificate
- Mozilla Firefox:
- Open Options > Privacy & Security > Certificates
- Then click on “View Certificates” and this will open a Certificate Manager pop-up window
- Navigate to the Authorities tab and import the downloaded certificate.
- While importing the certificate check the “Trust this CA to identify websites” checkbox.
- Google Chrome:
Create a VM from the ISO image
Make sure your computer has virt-viewer installed. This can be setup using yum|dnf|apt-get install virt-viewer on linux or by downloading a Windows MSI from the VMM Website. Note virt-viewer is not supported on Mac OS X.
-
Navigate to the Compute - Virtual Machines and hit
New
-
Hit the
Createbutton under Instance Images to create one or more disks for the VM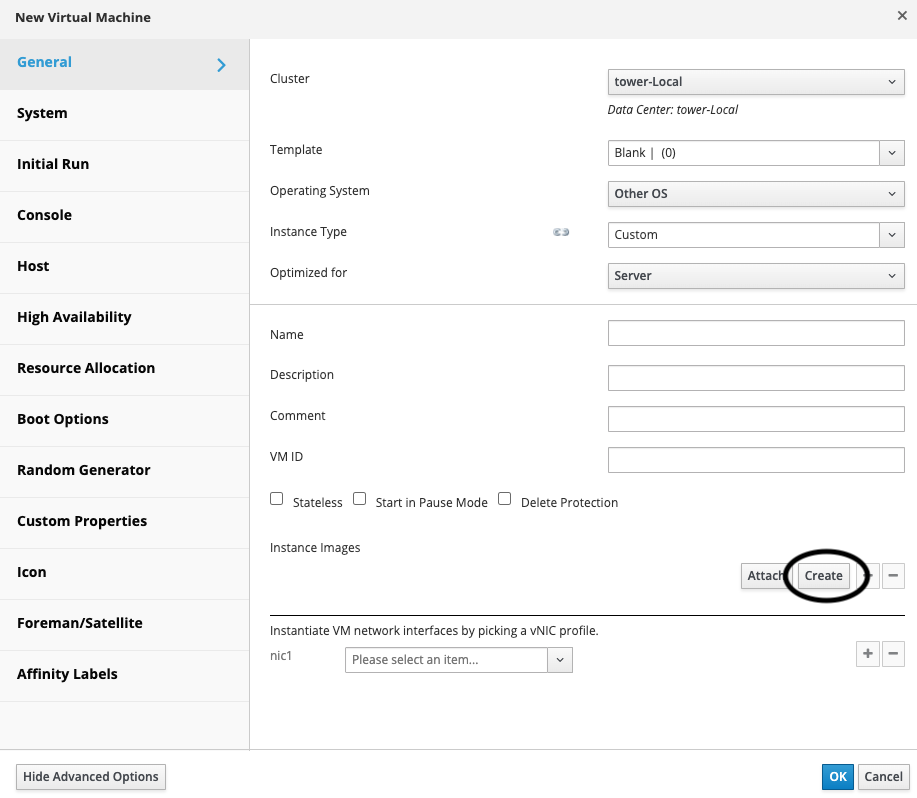
-
Select Server in the
Optimized fordrop down, supply a name and select a network interface profile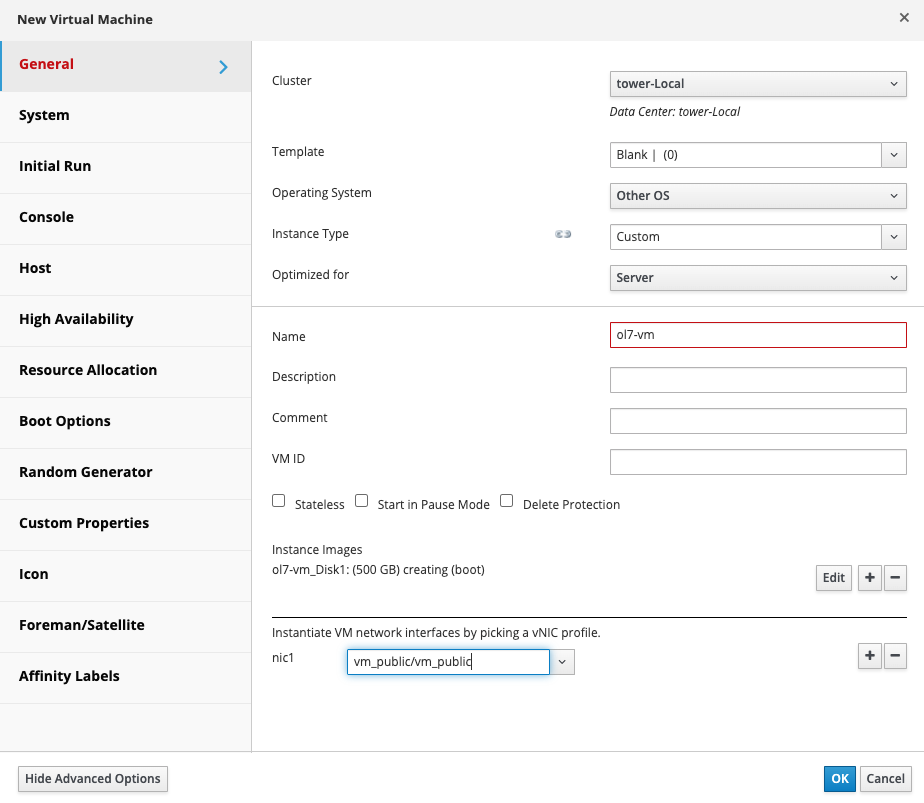
-
Click on System (Hit the
Advanced Optionsto expand the menu you don’t see a Systems item). Edit the Memory, Virtual CPU and Hardware Clock time. Note if the KVM host has been configured with hyper-threading enabled 2 virtual CPUs = 1 core.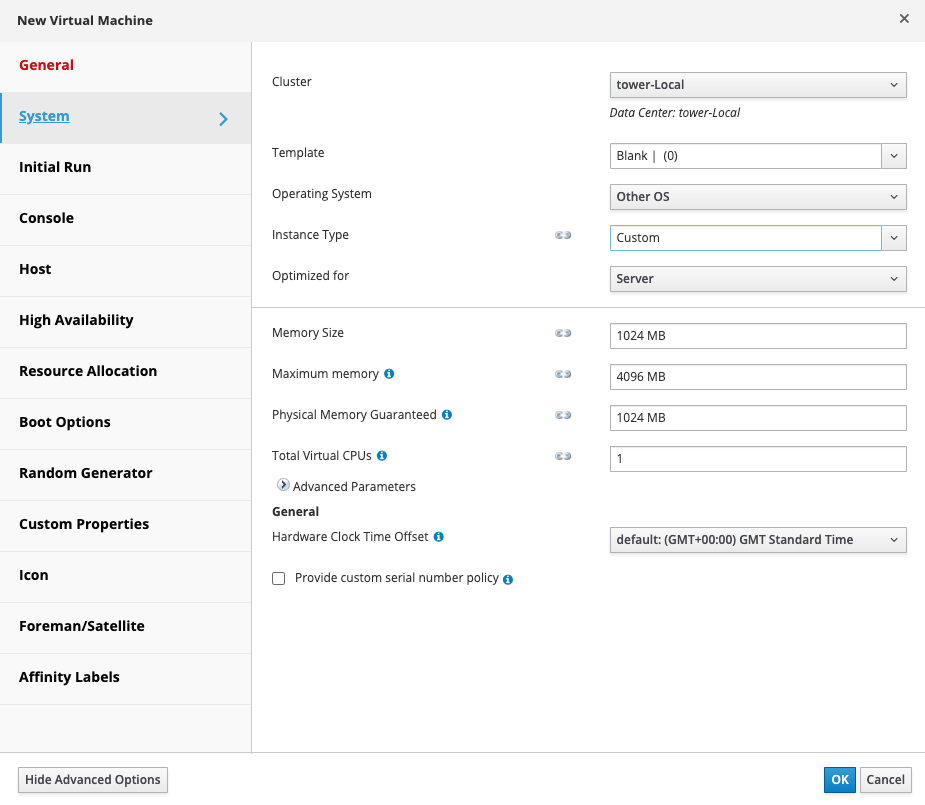
-
Click on Boot Options. In the Boot Sequence section set the
First Deviceto CD-ROM. Check theAttach CDcheckbox and select the ISO image from the drop down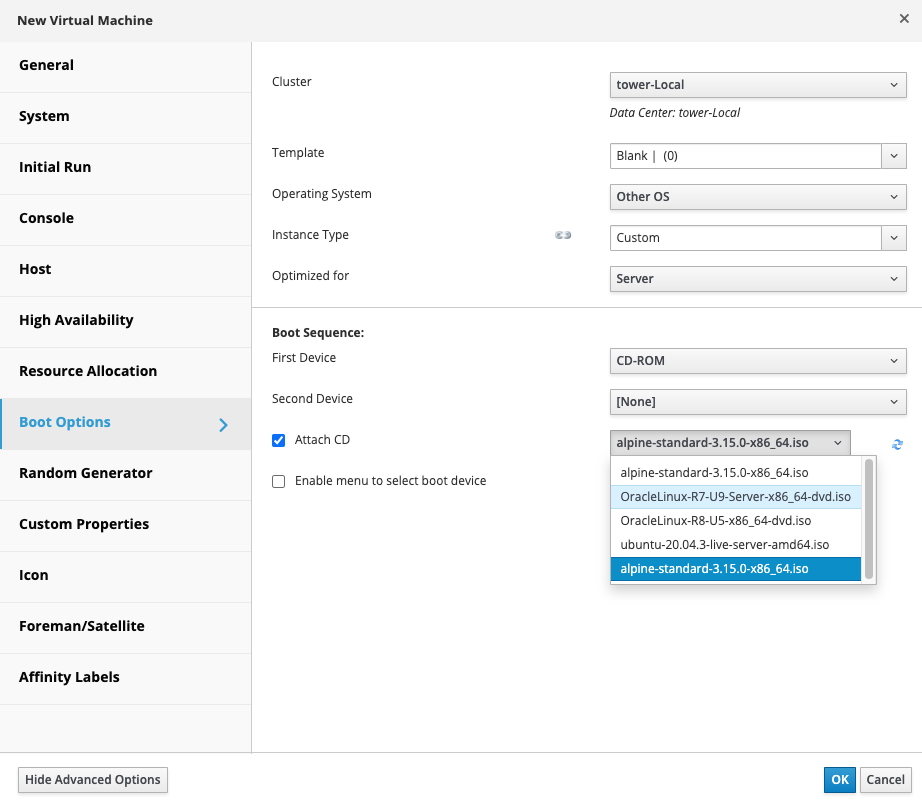
-
Hit
OK -
The New VM should appear in the VM list with a status of
Down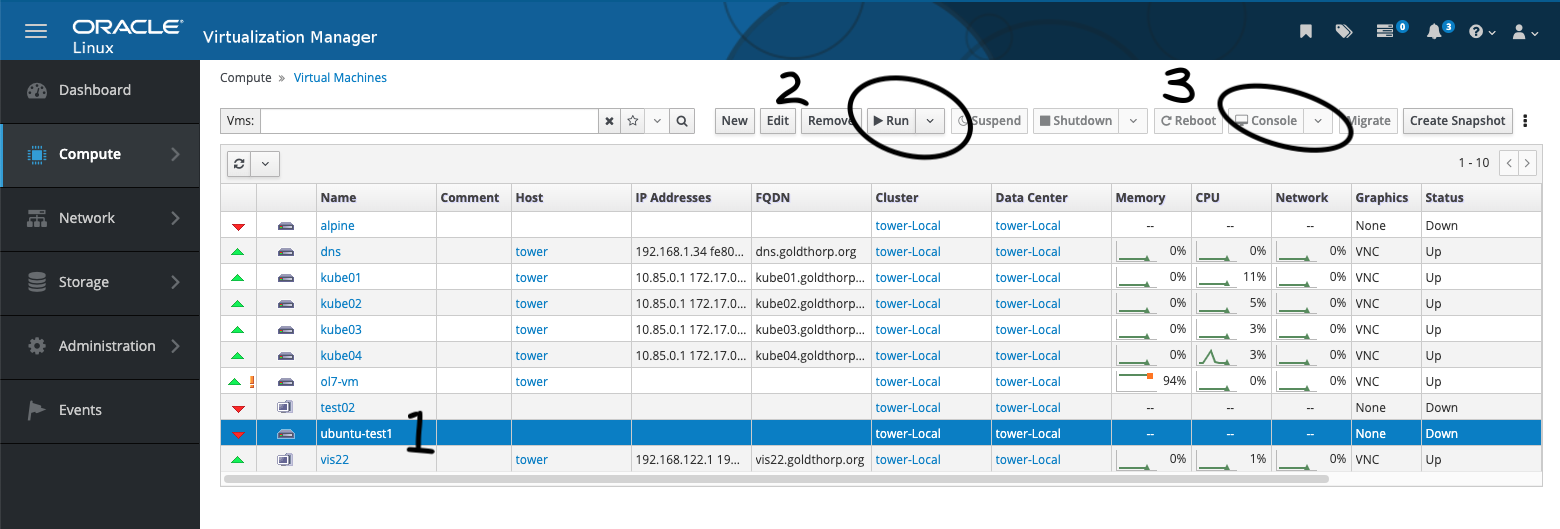
Start the VM and use the Console to install the OS from the iso image
- Select the VM row
- Hit the
Runbutton - Hit the
Consolebutton to launch a console window in virt-viewer (it may take 30 seconds for the Console button to become enabled)
- Follow the setup instructions in the OS installer
- OEL 7 Install Guide
- OEL 8 Install Guide
- Assign an a static IP address and FQDN during installation
- Set the following partition sizes for database server VMs
root 30G /home 50G /sw 75G /u01 25G - Verify the assigned values are recorded in the
/etc/hostsfiles on dns servers - Set the DNS search order to reference the dns servers.
- Edit the Boot Options to remove the CD-ROM from the boot sequence before rebooting when the OS installer completes
Create template from VM
-
Shutdown the VM and select
Make Templatefrom the More Actions menu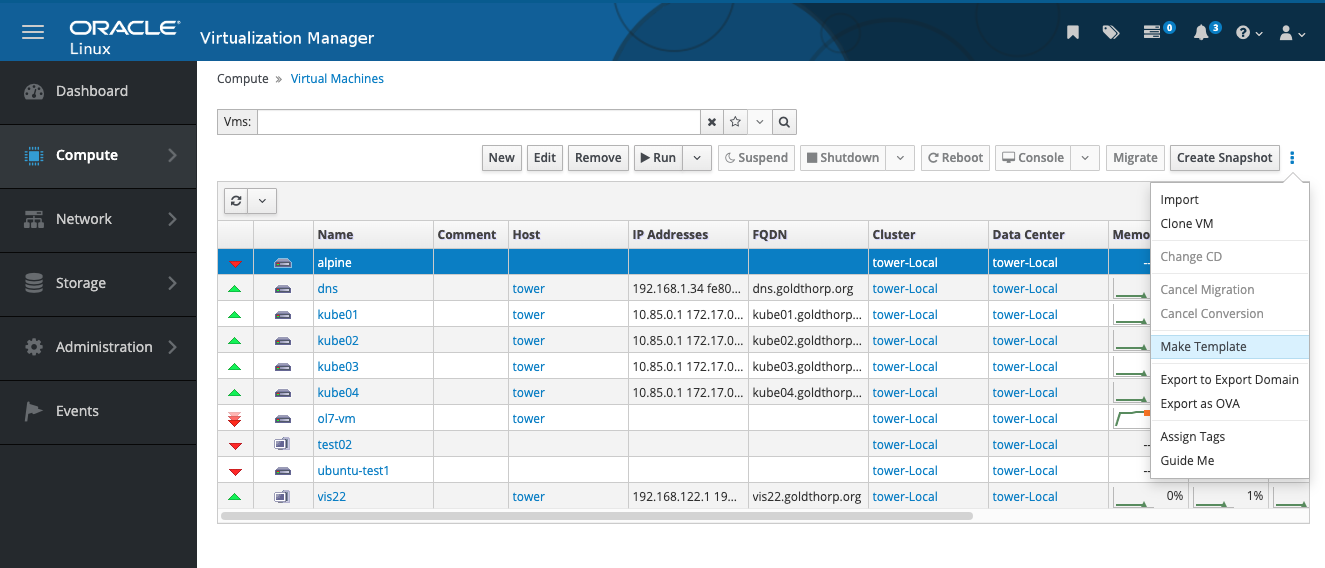
-
Name the template, update the disk allocation aliases and check the
Seal Templatecheckbox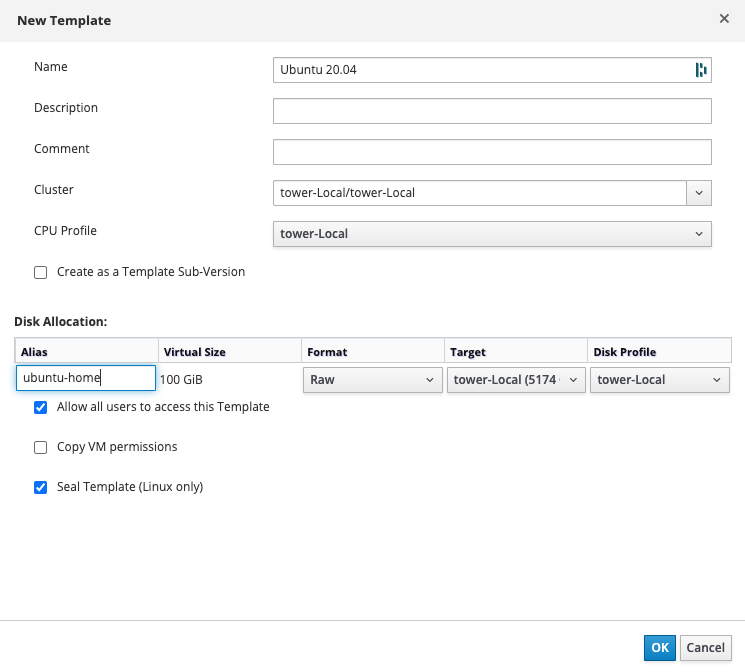
Sealing the template should perform the following
- Remove SSH host keys
rm -rf /etc/ssh/ssh_host_* - Remove udev rules
rm -rf /etc/udev/rules.d/70-* - Remove the HWADDR and UUID lines in the
/etc/sysconfig/network-scripts/ifcfg-eth*file. - Delete all the logs from /var/log and build logs from /root.
- Cleanup the command history
history -c
- Remove SSH host keys
-
Hit the
OKbutton
Copyright © Dito LLC, 2023