Install Solaris on Google BMS + OLVM
Peter Goldthorp, Dito October 2022
Oracle Solaris 11.4 can be used as an OLVM guest operating system in an inaBOX | Bare Metal environment. Oracle Solaris 11.4.33 (Oracle Solaris 11.4 SRU 33) is the minimum supported version. This can be downloaded from the Oracle Software Delivery Cloud. Additional details are available in the Oracle Linux KVM User’s Guide.
Download Solaris
Login to edelivery.oracle.com and download the Oracle Solaris Common Build environment for x86.
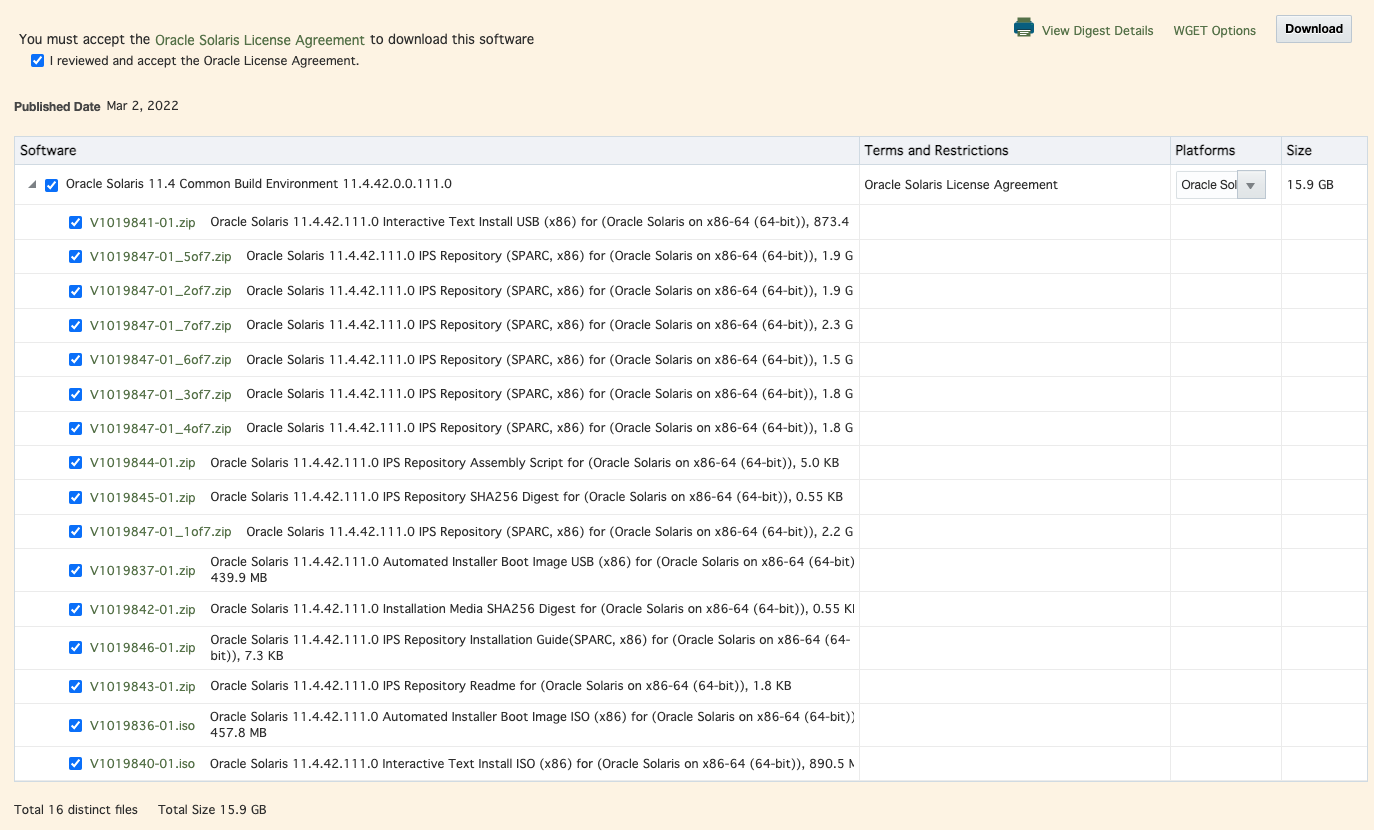
Create a boot CD
Follow the ISO image upload instructions to upload the Interactive Text Install ISO (x86) image from the Common Build download.
Use the OLVM Admin Portal to create a VM
Follow the Create a VM from ISO image instructions to create a VM with the following properties:
| Option tab | Property | Value |
| General | Instance image | Create 300 GiB boot disk |
| System | Total Virtual CPUs | 2 (or 4 if hyperthreading had been enabled) |
| Memory Size | 8193 MB | |
| Chipset/Firmware Type | i440FX Chipset with BIOS | |
| Boot Options | First Device | CD-ROM |
| Attach CD | The interactive text install ISO uploaded previously |
Leave the other settings at their default values and hit the OK button
Install Solaris
Wait for the VM and its Boot Disk to be created and then start the VM. Use the Console to access the installer.
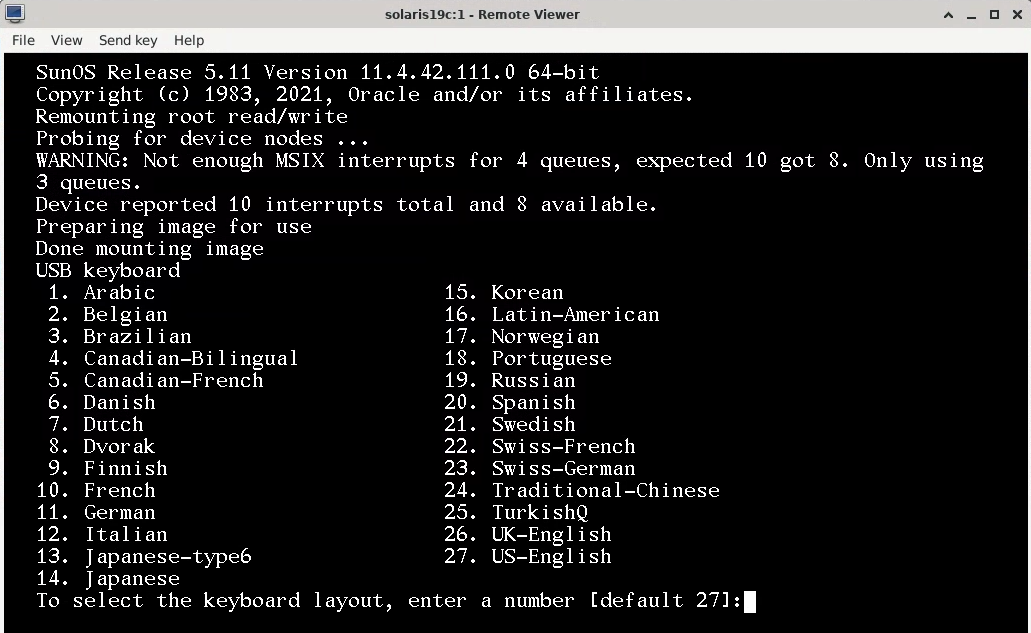
Navigate through the install steps using the F2 key. Configure the installation with 8 GB of swap space (equal to the memory size). Leave the support.oracle.com credentials blank. The VM does not have internet access and will not be able to validate them. Wait for the installation to complete. Note it may spend a long time at 99% before showing a completion message like the one below.
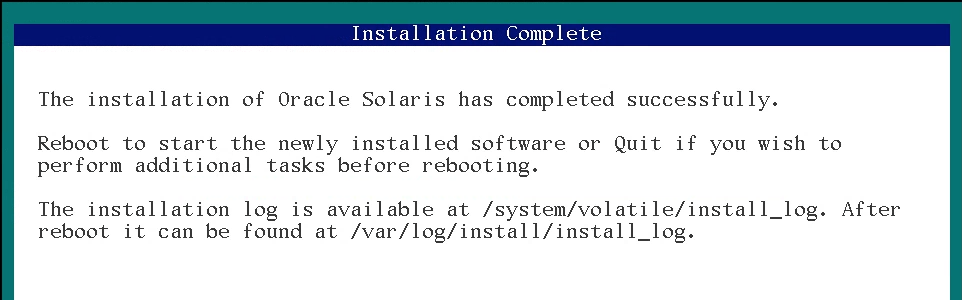
Return to the OLVM Admin Portal and update the Boot Options. Set the First Device to Hard Disk and uncheck the Attach CD flag. Then press F8 in the Console window to reboot the VM.
Create a Local Image Packaging System (IPS) Repository
Follow these instructions to setup a local IPS repository on a single VM for testing. Consult the Oracle Solaris documentation instructions on how to configure a shared repository for use in a production environment.
-
Login to the Solaris VM as root, create a new directory
/exports/ipsand copy the multi part IPS Repository zip files from the Oracle Solaris Common Build into it. -
Unzip the files to build a repository
# unzip V1019847-01_1of7.zip # unzip V1019847-01_2of7.zip # unzip V1019847-01_3of7.zip # unzip V1019847-01_4of7.zip # unzip V1019847-01_5of7.zip # unzip V1019847-01_6of7.zip # unzip V1019847-01_7of7.zip # ls -l total 27857272 -rw-r--r-- 1 root root 3421 Dec 7 2021 COPYRIGHT -rw-r--r-- 1 root root 1584 Dec 7 2021 NOTICES -rw-r--r-- 1 root root 2851 Dec 7 2021 README-repo-iso.txt -rw-r--r-- 1 root root 2327002983 Oct 28 15:47 V1019847-01_1of7.zip -rw-r--r-- 1 root root 2092174989 Oct 28 15:47 V1019847-01_2of7.zip -rw-r--r-- 1 root root 1890531379 Oct 28 15:48 V1019847-01_3of7.zip -rw-r--r-- 1 root root 1894175190 Oct 28 15:48 V1019847-01_4of7.zip -rw-r--r-- 1 root root 2020776966 Oct 28 15:48 V1019847-01_5of7.zip -rw-r--r-- 1 root root 1608923395 Oct 28 15:49 V1019847-01_6of7.zip -rw-r--r-- 1 root root 2447444866 Oct 28 15:49 V1019847-01_7of7.zip -rw-r--r-- 1 root root 355 Dec 7 2021 pkg5.repository drwxr-xr-x 3 root root 3 Oct 28 16:45 publisher -rw-r--r-- 1 root root 702 Dec 7 2021 readme.txt -
Configure Solaris to use the local repository
# pkg publisher PUBLISHER TYPE STATUS P LOCATION solaris origin online F https://pkg.oracle.com/solaris/support/ # pkg unset-publisher solaris Updating package cache 1/1 # pkg publisher PUBLISHER TYPE STATUS P LOCATION # pkg set-publisher -g file:///export/ips/publisher/solaris solaris # pkg publisher PUBLISHER TYPE STATUS P LOCATION solaris origin online F file:///export/ips/publisher/solaris/ -
Verify the result
 # pkg update
 No updates available for this image.
Install Oracle 19c
Follow the instructions in the Database Installation Guide for Oracle Solaris to setup a database on the VM.
Setup Environment
Run the following commands as root
-
Install prerequisite packages
# pkg install oracle-database-preinstall-19c Packages to install: 17 Mediators to change: 1 Services to change: 4 Create boot environment: No Create backup boot environment: No DOWNLOAD PKGS FILES XFER (MB) SPEED Completed 17/17 326/326 171.4/171.4 -- PHASE ITEMS Installing new actions 716/716 Updating package state database Done Updating package cache 0/0 Updating image state Done Creating fast lookup database Done Updating package cache 1/1 -
Create an Oracle user account
# pkg install oracle-database-os-configuration Packages to install: 1 Create boot environment: No Create backup boot environment: No Release Notes: pkg://solaris/group/prerequisite/oracle/oracle-database-os-configuration This package will create, by default, the oracle user (oracle) and two Unix groups, (dba and oinstall). If these defaults are not required then uninstall the package: group/prerequisite/oracle/oracle-database-os-configuration Do not modify the created entries in /etc/passwd or /etc/group because this will cause 'pkg verify' and 'pkg fix' to report and undo the modifications. The auto_home(4) map can be updated to provide an entry for the real location of the oracle account home directory. The home-dir field in /etc/passwd should not be changed. If these actions are not wanted prior to the install then running pkg avoid oracle-database-os-configuration will ensure that the package is not installed when the database prerequisite package is installed. DOWNLOAD PKGS FILES XFER (MB) SPEED Completed 1/1 3/3 0.0/0.0 -- PHASE ITEMS Installing new actions 11/11 Updating package state database Done Updating package cache 0/0 Updating image state Done Creating fast lookup database Done Updating package cache 1/1 -
Set a home directory and password for the user
# mkdir /export/home/oracle # chown oracle:oinstall /export/home/oracle # usermod -d /export/home/oracle oracle # passwd oracle WARNING: changing account in reserved uid range: oracle. New Password: Re-enter new Password: passwd: password successfully changed for oracle # passwd -u oracle WARNING: changing account in reserved uid range: oracle. passwd: password information changed for oracle -
Setup OFA directories
mkdir -p /u01/app/oracle/product/19c/dbhome_1 mkdir /u01/app/oraInventory chown -R oracle:oinstall /u01/app -
Check shared memory resource controls value and reset if necessary. Set the privileged value to 4 GB if it isn’t already set to this.
# prctl -n project.max-shm-memory -i project default project: 3: default NAME PRIVILEGE VALUE FLAG ACTION RECIPIENT project.max-shm-memory usage 0B privileged 1.93GB - deny - system 16.0EB max deny - # prctl -n project.max-shm-memory -v 4gb -r -i project default # prctl -n project.max-shm-memory -i project default project: 3: default NAME PRIVILEGE VALUE FLAG ACTION RECIPIENT project.max-shm-memory usage 0B privileged 4.00GB - deny - system 16.0EB max deny -
The Oracle installer needs the FQDN to resolve to the VMs IP. By default the Solaris installer will set it to 127.0.0.1 in /etc/hosts. Edit the hosts file to specify an IP address. Alternatively configure Solaris to use a DNS server that can resolve the address.
-
Logout of the VM and Reboot it from the OLVM Admin Portal
Install Oracle
SSH into the VM from the Chrome Remote Desktop as user oracle using the -Y flag. Example:
ssh -Y oracle@10.2.0.120
Password:
Oracle Solaris 11.4.42.111.0                  Assembled December 2021
-
Download the database software from edelivery or Oracle database downloads.
-
Unzip to the
/u01/app/oracle/product/19c/dbhome_1directory created earlier# unzip SOLARIS.X64_195000_db_home.zip -d /u01/app/oracle/product/19c/dbhome_1 -
Create a
.bash_profileand set environment variables# vi .bash_profile export ORACLE_HOME=/u01/app/oracle/product/19c/dbhome_1 export ORACLE_BASE=/u01/app/oracle export ORACLE_SID=orcl export PDB_NAME=orclpdb echo ORACLE_HOME = /u01/app/oracle/product/19c/dbhome_1 export ORAENV_ASK=NO . /u01/app/oracle/product/19c/dbhome_1/bin/oraenv # source .bash_profile -
Start the oracle installer and configure a database
 # cd $ORACLE_HOME
 # ./runInstaller &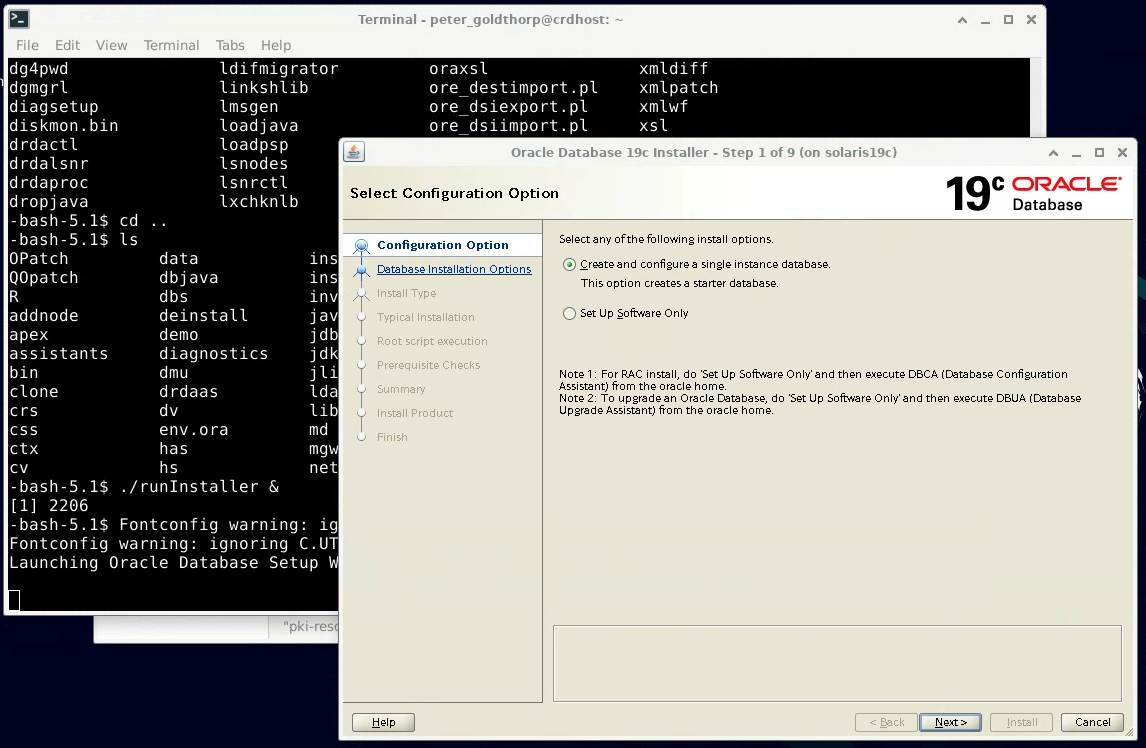
-
Check the result:
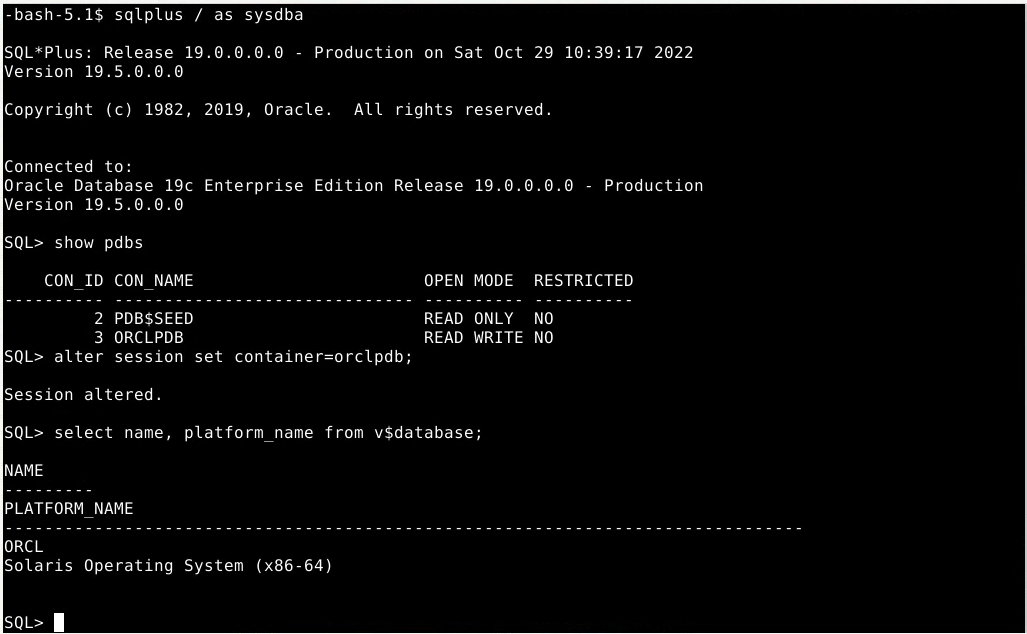
Copyright © Dito LLC, 2023